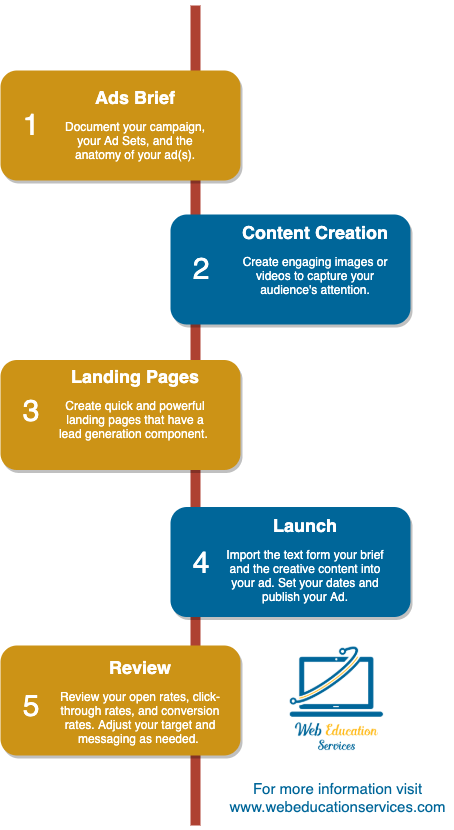
How to Create and Publish a Facebook Ad
Learn how to create and publish a Facebook Ad to improve your lead generation, start more sales conversations, and get more customers.
Step 1: Outline Your Digital Ad
List of Services
-
1. Open your ad brief templateList Item 1
If you don't have an ads brief template for your company, open ours.
-
2. Create a strategyList Item 2
In general, you want your ad campaign to have a general strategy.
This includes a Campaign name that is used for quick reference, a campaign objective, a target audience, a theme, and a call to action.
For more details, open our ad brief template.
-
3. Ad set configuration
Defining your ad set is about determining your delivery method, your bidding strategy, your target demographics, target geographics, and target psychographics.
For more details, open our ad brief template.
-
4. The anatomy of the ad
The anatomy of the ad is what people see in their feed.
Here you write your post text, identify your post creative, write your headline, identify your URL, identify your CTA, identify your landing page, and thank you page.
For more details, open our ad brief template.
Step 2: Content Creation
List of Services
-
1. Free stock imagesList Item 1
Our favorite go-to for free stock images is unsplash.com. The images are royalty-free, and you are not required to credit the photographer. However, it is recommended.
-
2. Free photo editorList Item 2
Now that you've downloaded your photo, you can make it your own by adding filters, blurring backgrounds, adding text, and making other simple changes.
We recommend pixlr.com for simple photo editing.
-
3. Stock video
Our favorite go-to for stock video is https://pixabay.com/. The video is free, and you are not required to credit the videographer. However, it is recommended.
-
4. Video editor
Now that you have a video or even a few images that you want to turn into a slide show, you need a video editor.
We recommend iMovie. It is an intuitive video editor that is great for individuals that are just getting started.
Step 3: Landing Pages
List of Services
-
1. Design Your FormList Item 1
The form collects the information needed to convert a visitor into a lead.
Remember, the less you ask, the more likely a person completes the form. If you are only asking for them to subscribe to your blog, ask for their email.
If they are looking for a demo, have fields for name, email, and phone number. Depending on the ad and the giveaway, you can ask for more or less information.
-
2. Layout your page
You should have a content management system that allows you to create landing pages easily. See your CMS help center for specifics.
If you can't create a landing page, check out our video below.
Step 4: Launch
Facebook Ads Launch
-
1. Go to Facebook Business ManagerList Item 1
You want to open your Facebook Business Manager. If you haven't setup business manager, go to our how to guide to get started.
-
2. Navigate to Ads Manager
Go to the ads manager in your Facebook Business Manager. Or click on our quick link below.
-
3. Input your ad and creative
- Click on the green plus icon to create a new campaign.
- Complete all the fields in the campaign editor. Use your creative brief as needed.
- Complete all the fields in the ad set. Use your creative brief as needed.
- Complete all the fields in the ad. Use your creative brief as needed.
- Add additional ad sets and ads as needed. Use your creative brief as nedeed.


